The Glazier Reality: Why Your AC is Losing the War Against Photons
In twenty-five years of standing on ladders and peering into the failure points of building envelopes, I have learned that most homeowners are fighting a losing battle against the sun. I remember a specific call in a sweltering July where a homeowner was convinced their brand-new double-pane units were defective because the room was still eighty degrees. I walked in with my hygrometer and a thermal camera. I showed them that while the air was conditioned, the radiant heat from the glass was hitting the sofa at 110 degrees. It was not the windows; it was the lack of a thermal barrier. This is the reality of the Solar Heat Gain Coefficient (SHGC). In southern climates, you are not just managing air temperature; you are managing radiation. When we talk about cutting 2026 cooling bills, we are talking about stopping the infrared wave before it ever touches the glazing bead.
“Installation is just as critical as the window performance itself. A high-performance window installed poorly will fail to meet energy expectations or structural requirements.” AAMA Installation Masters Guide
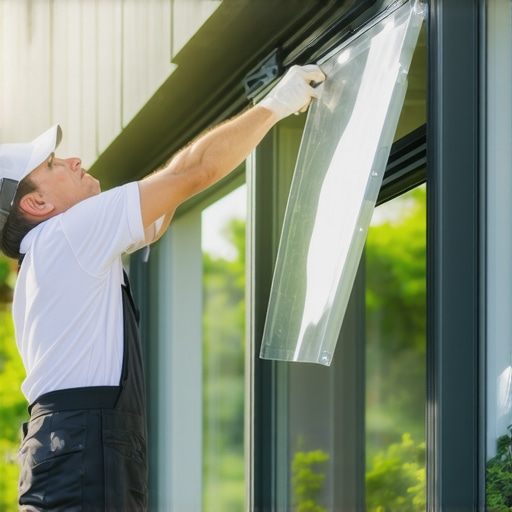
Step 1: Assessing the Rough Opening and Sill Integrity
Before you even think about ordering solar mesh, you must perform a structural audit. Many installers engage in what I call the caulk and walk method, ignoring the underlying rot. If your current frame shows signs of moisture infiltration, a window sill replacement is mandatory. We look for punky wood or spalling masonry. You cannot mount a high-tension solar screen to a crumbling substrate. I check the rough opening tolerances using a precision level. If the frame is racked, the screen will never sit flush, creating a chimney effect where hot air is trapped between the screen and the glass, actually increasing the thermal load. Proper window sill replacement involves ensuring the sill pan is correctly flashed to shed water away from the wall cavity, keeping the interior dry while the exterior fights the heat.
Step 2: Material Selection and the Physics of SHGC
Not all screens are created equal. We are looking for a material that maximizes visible transmittance while minimizing the SHGC. In the trade, we analyze the weave density. A 90 percent block screen is excellent for west-facing walls but can make a room feel like a dungeon. We often recommend a custom window fabrication approach where we vary the density based on the orientation of the house. While electrochromic smart windows are the gold standard for active light control, they require a significant capital investment. A high-quality solar screen provides a passive version of that technology at a fraction of the cost. The key is the distance between the screen and the glass. You need enough of a gap to allow for convective cooling, but not so much that you lose the shading benefit.
Step 3: Managing the Perimeter and Specialized Openings
Standard rectangular windows are easy. The real skill comes with round top window services. Arch-top windows are notorious for being heat leaks because most off-the-shelf screens do not fit them. We fabricate custom frames that follow the exact radius of the muntin. This ensures that every square inch of the glazing is protected. During this phase, we also look at integrated systems. For high-security environments, we might even discuss bullet resistant window glass. While primarily for safety, the thick laminates in bullet resistant window glass have incredible thermal mass properties that, when combined with an exterior solar screen, create an almost impenetrable thermal barrier.
Step 4: Mechanical Attachment and Thermal Expansion
The screen frame must be anchored correctly to account for thermal expansion. In high-heat regions, a vinyl frame can expand and contract significantly. This is why I prefer aluminum or fiberglass frames for solar screens. We use stainless steel screws and ensuring that the shims are placed so that they do not interfere with the weep hole. If you block the weep hole, you are asking for a mold colony to start growing inside your sash. We also integrate electronic window locks at this stage if the homeowner wants automated security that works in tandem with the screen system. Modern electronic window locks can be programmed to alert you if the screen is tampered with, adding a layer of security to your energy efficiency.
Step 5: Skylight and Roof Window Integration
The hottest part of any house is usually directly under a skylight. Heat rises, and the sun beats down vertically. I often see people ignore their roof windows when planning for cooling. We provide fixed skylight services that include specialized horizontal solar screens. If you have a leaking unit, a skylight leak repair must be the first priority. You cannot install a screen over a unit that is actively compromising the roof deck. For those with deeper interior rooms, tubular skylight services offer a way to get natural light without the massive heat gain of a traditional skylight, but for existing roof windows, a roof window replacement with a modern, low-emissivity unit and an external heat shield is the only way to survive a 2026 summer.
“The Solar Heat Gain Coefficient (SHGC) measures how well a product blocks heat caused by sunlight. The lower the SHGC, the less solar heat it transmits, which is the primary driver of cooling costs in warm climates.” National Fenestration Rating Council (NFRC)
Step 6: Flashing and Water Management
Even though the primary goal is heat reduction, every glazier knows that water is the ultimate enemy. When we install these screens, we ensure the flashing tape is integrated into the existing weather barrier. If the solar screen frame creates a shelf where water can sit, it will eventually find a way into the wall. We use a high-grade silicone sealant, but we never seal the bottom edge completely. That bottom edge must remain open to allow moisture to escape from the sill pan. This is a technical nuance that the amateurs always miss. They seal the whole thing up, and two years later, I am back there performing a full frame tear-out because the studs are rotted.
Step 7: Final Tensioning and Calibration
The final step is the tensioning of the mesh within the glazing bead. A loose screen will rattle in the wind and look unprofessional. We use a high-tension spline to ensure the fabric is drum-tight. This is especially important for large custom window fabrication projects where the surface area of the screen is significant. We check the operation of the sash to ensure the screen does not interfere with the window’s ability to open and close. If the screen is too tight against the frame, it can bind the hardware. We finish by verifying that the electronic window locks are communicating with the home’s hub and that the aesthetics of the screen frames match the original architectural intent of the house.
The Conclusion: Precision Over Hype
Cutting your cooling bills for the 2026 season requires more than just buying a product. It requires a systemic understanding of the building envelope. Whether you are investing in tubular skylight services for your hallway or opting for a full roof window replacement in the attic, the goal is always the same: thermal control. Do not let a salesman talk you into expensive triple-pane krypton units if your real problem is solar radiation. A well-installed solar screen, combined with a properly maintained sill and frame, will provide a higher return on investment in a hot climate than almost any other glazing upgrade. Trust the physics, check your seals, and never compromise on the installation quality.
{“@context”:”https://schema.org”,”@type”:”HowTo”,”name”:”7 Solar Screen Installation Steps to Cut 2026 Cooling Bills”,”step”:[{“@type”:”HowToStep”,”text”:”Audit the rough opening and perform window sill replacement if rot is present.”},{“@type”:”HowToStep”,”text”:”Select solar mesh based on SHGC ratings and orientation.”},{“@type”:”HowToStep”,”text”:”Custom fabricate frames for specialized units like round top windows.”},{“@type”:”HowToStep”,”text”:”Secure frames using mechanical anchors that allow for thermal expansion.”},{“@type”:”HowToStep”,”text”:”Integrate solar protection for skylights and roof windows.”},{“@type”:”HowToStep”,”text”:”Verify flashing and ensure weep holes are clear for moisture drainage.”},{“@type”:”HowToStep”,”text”:”Tension the mesh and calibrate the screen for final operation.”}]}